Showing posts with label pattern. Show all posts

12.23.2013

Ladies Glasses Pattern

A lot of people have off work this week.  And if you are anything like me you need something to keep your hands buy.  Why not try this?

This is the glasses pattern on which I based the project on my last blog.


Now I have it for you for FREE.

Please head over to Craftsy to download a pdf version of my ladies glasses.

Please let me know what you think of the pattern and link back after you have completed it.

I love these glasses!

Cat Eye Glasses {heart} Mustache.

I've always been a little ahead of trends.

When I was 12 I started wearing black lipstick in 1994.  With my hyper color. And my perm.

When I was about 14 I started wearing dresses over jeans.  That got popular about 5 years later.

When I was 16 I painted my room purple and installed black and white checkered tiles.  In the basement.  It was freezing.  That summer I worked at Tinseltown in North Aurora.  And their whole motif is purple and black and white tile.

I'm not bragging.  It's a curse really.

I love hexagons, neon and neutrals, chevrons and mint green.

And I love cat eye glasses and mustaches.


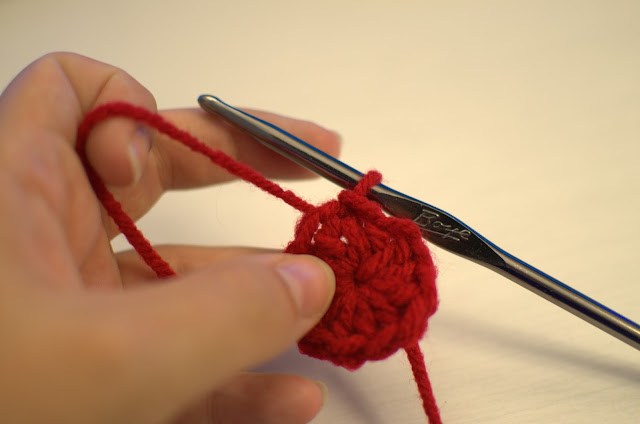
I finished this in a 6" hoop and gifted to a couple of people that don't mind that it vaguely (alright maybe not very vaguely) looks like a face.


I really really love these colors together.  I want to just BATHE in it.

You can find the pattern for the glasses here. For FREE!

12.17.2013

Oh Christmas Tree

A bit ago I gave a pattern for a blackwork Christmas Tree.

Of course I started the tree before I did the pattern, so It doesn't match.  I finally completed it.  And I HEART it.  I gave it to my mom :)

The best part is that I used my Kreinik thread.  All the metallic is Kreinik and it turned out beautiful.  I enjoy working with the tread.  Everything from the fact that it's in a spool to the different weights.  Love it.


I kinda love the back.


11.22.2013

Blackwork Christmas Tree Pattern

At 31 years old, last week, I purchased my first Christmas tree. 
It was on a great sale from Michaels.  With two kids it felt like it was time to start caring about Christmas. 

With that I've decided to make a ornament each year.  Some day I will be gone and what else will my kids have to remember me by but a box of ornaments they will be obligated to keep in the back of the closet.  They don't even like embroidery, but Mom made them.

So, here is the first:  2013


I've started it and will post when finished  :)

10.20.2013

Free "Value" Cross Stitch Pattern

This was the first one I did so It will be the first I give away.  :)


I wanted something clean and simple and beautiful.  First I was thinking about camera terms like aperture and f-stop and light meter.   All things I want to play with in the future.  

Naturally I then went to color and texture and tone and VALUE. 

Value refers to the relative lightness or darkness of a certain area. Value can be used for emphasis.

Values are added to colors to create what you and I see as the different colors within true color. The difference between a powder pink and deeper rose pink. 

Like this -


Depending on what website or book you look at the scale has a few or many light to dark shades.  I settled on 5 for the sake of the piece.

The DMC colors are (left to right)
762, 415, 414, 371, 3799

The lettering works best as a middle gray.  I didn't do this, but I think that was a mistake.  I would suggest using 317.


As always, comment below for a pdf of the pattern and color selections.  

Wish me luck!


10.11.2013

RuPaul Cross Stitch!


Just a friendly reminder. Do you have a deadline? A date? A new project to complete? A new dress? Well, you better work it!

Made to fit in 8X10 frame using 14pt cloth. Green lines denote 10 spots.


This is for sale on my Esty, but since I just gave life I thought I'd give a little love too.  :)

I trust you all know about right click save as.  If not, leave me a comment about who you will be making this for and I will send you the pattern as a PDF.  


9.11.2013

The DforV Etsy Shop is Officially Open!

Finally, right?  

I have been having a good time making up my odd little cross stitch patterns in Photoshop.

It's a cool way to play with really simple design.  I haven't found a software that works how I want it to but I have figured out a round about way to create a pattern with the pixels as a square.  It works, that's what matters.  Maybe I'll put up a tutorial on how I create a pattern with PS.  Hmm.  Good idea, me.  :) 

So I opened up the shop to share my patterns.  I won't use them all.  Some will be dumb, some abstract, some really mainstream. We'll see what people like.  


I'll eventually put up some crochet patterns and finished pieces. Maybe after the baby is born and things settle down a bit.   Shrug.  We'll see!

So many possibilities!  So much potential!

I've got two for sale at the moment.  

The first is what I think of when Violet sees the cat.  She is in love with the cat.  The cat is a good sport.  But she really loves and squeezes him.  She will yell KITTY! at the top of her lungs until she gets to him then gets in his face and says HI KITTY.  Poor animal doesn't even bother anymore.  


You can get the pattern on Etsy right over here

8.11.2013

Bow Pattern, Now For Sale!!!

Hi everyone!  It's finally complete.  My sweet little bow is now for sale.  Please head over to Ravelry to purchase a copy.

You will be able to make this dainty little guy.  I love this bow.  It's something that took me many of my newly acquired crochet skills to complete.  


I'll also be making about 12 of these to sell at Alley (ART) Fest.  If you don't crochet you can pick on up there.  ;)  OR, just lemme know and I can make you one custom.   A completed necklace will be $25.  I accept cash, paypal, Visa, mastercard, discover and AmEx.  And, of course, craft trade.  :D

I really just hope you think it's as cute as I think it is.  

Thank you!

8.02.2013

First Friday Free Pattern: Simple Modern Afghan

I love Mod.  The fashion, the hair, the lines, the structure, the colors.  Yum.  As a crocheter I see a lot of pretty flowery or complicated color worked afghans.  Don't get me wrong.  Its nice.  I love me an good doily.    But I just want something simple and interesting.  I hate variegated yarn.  I love neutral and neon.

I have a smallish Tiffany blue velvet love seat in my living room.  A love seat needs an afghan.  I decided on gray on gray.  But I still wish I had used lime.  I first made a baby blanket with this design.  I call it Pear Creamsicle. <333  (it's for sale....)


Materials
Measureing Tape
K hook
Darting Needle
Worsted Weight yarn


  • 2 skeins of color 1 (Hobby Lobby's I love this Yarn in Graphite)
  • 1 skein of color 2 ( Hobby Lobby's I love this Yarn in Lt. Gray)

Let me explain this huge hook.  This stitch is very simple and creates a beautiful texture.  You can use a smaller hook, very easily, but I like to use the bigger one to make it less heavy and more soft.  It's like there is more air in the stitch. Cause, well, there is.

Stitches
hdc - Half Doublt Crochet
dc - Double Crochet
ch- Chain
sk ch - skip one chain stitch
ch sp - chain space
( ) - this means to do all the stitches into one space or stitch

Techniques
changing colors

Firstly, I decided how big I want this blanket.  The baby one above is 35"x35".  The small afghan below is 50"x50".  You will need to figure out how big you want the inner square.  It's simple math really and then paying some attention as you go.  (I do see that this doesn't match up to 50.  It's really just an about 13 and about 22 and even about 50. Because the hook is so big it will stretch.)


I choose this odd size because I love anything square and it's the right size for my Tiffany Blue Velvet love seat in our sitting room. 

The stitch is called a Rope Stitch.  I'm sure you would be able to find it online.  I've seen it in a few different places.  If you happen to have the Crochet Stitch Bible it's page 74.  :)

Begin by chaining multiples of 3 until you have reached the desired length.  The following pattern is what I did to make my "Gray Squared Lover's" afghan.  (I like to name things.) 

Row 1 - Ch 135 + 3 for turning chain.  

Row 2 - dc into the 4th ch from the hook.  *ch1, dc in next ch, sk ch, dc in next ch* Rep*to * until the last ch sp and dc into that last ch sp. Turn your work. 

Row 3 - Ch3, *(dc,ch1,dc) into the ch-1 sp* Rep* to * until all spaces are completes.  dc into the ch-3 space of the turning chain. Turn your work.

FYI - This is called a "rope stitch".  

Row 4 to 18 - Repeat Row 3

Row 19 - Ch3, *(dc,ch1,dc) in the ch-1 sp* for the next 11 ch-1 spaces.  Change from color 1 to 2 between the 11th and 12th spaces.  Continue.  Change from color 2 to 1 between the 32nd and 33rd space. Continue until the end. dc into ch-3 space.  Turn.

*Tip* I used two skeins for two colors.  You can use three is it makes it easier, and it might.  I didn't cut the middle color at all, but carried it up.  The outside color needs to be cut so that you can connect it to the other end.  Leave at least 4 inches so you can sew it in really tight, if one of these comes loose its going to be a pain to fix. 

In theory you can carry the dark color over the light color but you are going to waste a lot of yarn and it makes it hard to hold onto cause it bunches all up.  

This is a little odd at first but you will get used to have two skeins going at once.  When I cut I didn't crochet on top of the cut yarn because I knew I was going to be sewing it in later anyway, so I didn't bother, plus this way I can pull it a bit tighter to make sure that the stitch matches well.

Row 20 to 36 - Repeat row 10.

Row 37 to 55 - Repeat row 3.

Finish off after Row 55.  

Your blanket is complete.  :)

The last thing you will do is tie in the million little 

Border:  (if you so choose to do a border)

It's just half double crochet all the way around.  
Start in the center of the last row, attach and chain 2, half double crochet twice in each space until the corner. 4 hdc in the corner. Continue with three hdcs in each space for the sides.  4 hdc in the corner. Continue around, join and finish off.

This blanket has become our favorite morning cartoon snuggle blanket.  Its soft, comfy and not too warm.


If you use it, here is the pattern on Ravelry and Pinterest

7.07.2013

Super Simple Baby Hat Step by Step (w/ photos!)

I realize it's July, but what's more fun than a crocheted winter hat?  I made one of these for my son that is due in October.  We live in Chicago so he will likely be wearing a hat until April.  So, I will need a few of them  :)

I'll show you how to make this little guy. 


This is a beginner pattern for a newborn winter hat.

Materials
I hook
Worsted Weight yarn. 
 - I have Red Heart With Love

Stitches
Magic Circle
hdc - Half Double Crochet
ch - chain
sl - slip stitch
sp - space
fl- front loop
front loop only (I'll show you)

Also
  • The beginning of each row will have a ch 2.  This counts as the first hdc.  Meaning when you should end up with 24 hdc at the end of a row, you will have a ch2 and 23 hdc. 
  • You are joined at the end of each round.  This is not a continuous stitch.  (which means if you want to change colors it will look a lot nicer)
***NOTE***
If you just want the pattern look for the bold and italicized row directions.


I used hdc on this because its just a fuller, warmer stitch.  

First.  

Row 1 - You want to do a Magic Circle (see above for the link to a video).  Ch2 and 11 hdc and join (12hdc) 

Here is your join - 
You are going to insert your hook at the 2nd chain you chained in the very beginning.  This will make it look more seemless.  If you go into the space, you will create a bigger space and a "seam" up the side. 


sl (slip stitch) 


Then ch2.  
This is the beginning of the next row.  
Remember that 2nd chain is where your hook will be going when you come back around to join.  If you want to make it a little easier on yourself go ahead and exaggerate this chain just a bit so it's easier to see.  


Hdc in the same space.  And continue around.


Row 2 - Ch2 then hdc in same stitch.  hdc in next stitch then 2hdc in the next stitch.  *hdc,2hdc* repeat* around and join in ch-2 sp.  (24 hdc)

So basically each stitch is a space between the comma.  The * tells you that you need to repeat these two different spaces over and over.  If it was all written out it would be ch2 and hdc, hdc,2hdc,hdc,2hdc,hdc,hdc,hdc,2hdc,hdc,2hdc,hdc,2hdc,hdc,2hdc,hdc, join.  

See why they shorten?  :)

Here is what that row is going to look like, and the join again just for fun.  


The next row is very much the same with a TWIST.  This time you will have two stitched of one hdc between a stitch of 2hdc.  Like this...

Row 3 -  Ch2 then hdc in same. hdc in each of the next two stitches then 2hdc in the third stitch. *hdc,hdc,2hdc* repeat* around and join in ch-2 sp.  (36 hdc)

Simple as that. If you are new to rounds and/or patterns this is odd at first, but it starts to make sense really fast.  

Now at this point is where I stop increasing the stitch.  Because this is a newborn hat I want to keep it small and its yarn so it's gunna stretch a bit.  So row 4 is going to be the same number of stitches as row 3, 36.  This is what it would look like in a book.

Also - you can add as many rows are you want.  This doesn't HAVE to be this size just add another hdc before doing the 2hdc increase.  You can go on forever.  :)

Row 4 - 10 - ch2 then hdc in same. hdc in each stitch around and join in ch-2 sp. (36 hdc)

Row 4 will be repeated until you have completed 10 rows.  

Go ahead.  I'll wait.  

(Tick. Tock. Tick.)

This is after 5 rows.  Because you aren't increasing it's starting to bowl.  


Stop at 10 rows.
We are going to do something a little different. You will do the same stitch but in the front loop only. This will cause the hat to be able to flip up easily.  

Row 11 - ch2 then hdc in same. hdc in each FL around and join in ch-2 sp. (36 hdc)

It looks like this. 

The stitch is a "v" shape.  You just want the side closer to you.  Here I pulled them out a bit.  


You will be able to easily fold it on itself.  It's almost a hat!


Continue.

Row 12 and 13 ch2 then hdc in same. hdc in each stitch around and join join in ch-2 sp. (36 hdc) (same as row 4 through 10) Finish off.

After the join pull up to make a big loop.


 Cut it and pull it up.


 Sew it in.


I like to make sure it's secure.  Finishing isn't a science, just weave it in a few times.  Just try not to knot, or you will have a lump.  


Lastly, sew in the tail from the magic circle.


Flip the brim down and wha-la!


Copyright - All photos, pattern, and crochet created and property of Teresa Millies.