Showing posts with label tutorial. Show all posts

11.12.2013

Tutorial on a Tuesday: Butttons.

Alllriiigght.  

Buttons.

This is how I make my buttons.  I've done maybe 5 now and they aren't easy and I was doing them pretty blindly so I want to show you how I do them.  It's not going to be the prettiest thing you ever saw from the back, but it works.  

FIRST.

Stitch something.


Then pick up some buttons, they look like this.


You want the one that says "kit" cause they have the little pushers with them.  The others will say "refill"  (the back gives directions on using the pushers).

I picked up these today. 


Best. Idea. Ever.  Trying to figure out how much would be on the the actual button and how much would fold was very awkward.  These make a few things more simple.  Basically, it tells you the size of the button, the inside size that will show and the outside size you need to cut to.  Seriously, but it.

Materials - 
Add double sided tape and some scissors to this list.


Again, this is how I do this.  Take it or leave it...

The back of your buttons are going to have a loop, so they can be used as a button. 

Take it off.  Some pliers to pry it off. 


Next, cut the stitch into the round shape you need.  You can use the template.  In fact, do it, use the template. 

Use a little piece of double sided tape to hold this down.  You are going to start folding and it's going to move when you don't want it to.  The tape is very helpful.


Next, use the template to make sure that you have your image centered. 


When you do, start folding the sides around.  This is the tricky part.  The cloth is thick, and the buttons aren't really made for such thick cloth.  So use the little pusher thing, and use it to smash down the edges and flatter them out.  Like this. 


Next put some poxy on the metal part that is still showing.  The heart button shown in my last post fell apart a couple hours after it had been on the kids coat.  You don't want the back to unattach.

Then put on the back.

The kit is going to tell you to use this stuff.  I say skip it.  Because of the fabric.  


Instead...


You are going to need to bent it a bit to get it snug.  The e6000 will do the rest. 

Speaking of, put some more on. 


Then put on the pin back.  Purchased for a couple bucks at Hobby Lobby.  Worth it. 


And then.  BAM!

This one is a gift for a friend.  I hope she likes it.  :) 

9.14.2013

DIY Rice Heat Pad. Mmmm That's Nice.

I'm 37 weeks pregnant with my second child.  I know, uf.

One of the things that I learned in child birth class (and while being a woman and having a crampy back and legs for a week a month every year for the last 20 years) is that heat feels good on sore muscles.

I wanted an awesome heat pad for my back during labor, they are a little expensive.  And I feel kinda dumb buying one when I can make one.

So instead of this....


I opened for this...


I cut up one of Jeff's old denim "dress" shirts.  Which I was very happy to do.  And found this pretty orange thread from the lot of sewing stuff in the case I got a the thrift I referred to in my last post.

It is 18x8 and fits really well across my lower back.  I filled it with a cup of uncooked rice in each compartment and the weight of it feels SO good.

I'm excited to use it in labor, considering I've been using it daily.  :)

I used a well written tutorial I found on Pinterest, here.

7.07.2013

Super Simple Baby Hat Step by Step (w/ photos!)

I realize it's July, but what's more fun than a crocheted winter hat?  I made one of these for my son that is due in October.  We live in Chicago so he will likely be wearing a hat until April.  So, I will need a few of them  :)

I'll show you how to make this little guy. 


This is a beginner pattern for a newborn winter hat.

Materials
I hook
Worsted Weight yarn. 
 - I have Red Heart With Love

Stitches
Magic Circle
hdc - Half Double Crochet
ch - chain
sl - slip stitch
sp - space
fl- front loop
front loop only (I'll show you)

Also
  • The beginning of each row will have a ch 2.  This counts as the first hdc.  Meaning when you should end up with 24 hdc at the end of a row, you will have a ch2 and 23 hdc. 
  • You are joined at the end of each round.  This is not a continuous stitch.  (which means if you want to change colors it will look a lot nicer)
***NOTE***
If you just want the pattern look for the bold and italicized row directions.


I used hdc on this because its just a fuller, warmer stitch.  

First.  

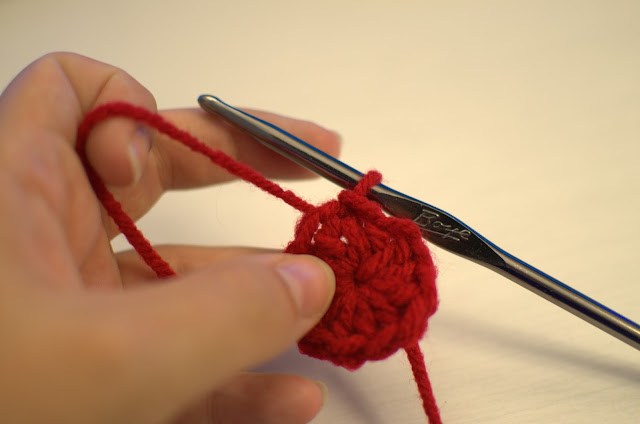
Row 1 - You want to do a Magic Circle (see above for the link to a video).  Ch2 and 11 hdc and join (12hdc) 

Here is your join - 
You are going to insert your hook at the 2nd chain you chained in the very beginning.  This will make it look more seemless.  If you go into the space, you will create a bigger space and a "seam" up the side. 


sl (slip stitch) 


Then ch2.  
This is the beginning of the next row.  
Remember that 2nd chain is where your hook will be going when you come back around to join.  If you want to make it a little easier on yourself go ahead and exaggerate this chain just a bit so it's easier to see.  


Hdc in the same space.  And continue around.


Row 2 - Ch2 then hdc in same stitch.  hdc in next stitch then 2hdc in the next stitch.  *hdc,2hdc* repeat* around and join in ch-2 sp.  (24 hdc)

So basically each stitch is a space between the comma.  The * tells you that you need to repeat these two different spaces over and over.  If it was all written out it would be ch2 and hdc, hdc,2hdc,hdc,2hdc,hdc,hdc,hdc,2hdc,hdc,2hdc,hdc,2hdc,hdc,2hdc,hdc, join.  

See why they shorten?  :)

Here is what that row is going to look like, and the join again just for fun.  


The next row is very much the same with a TWIST.  This time you will have two stitched of one hdc between a stitch of 2hdc.  Like this...

Row 3 -  Ch2 then hdc in same. hdc in each of the next two stitches then 2hdc in the third stitch. *hdc,hdc,2hdc* repeat* around and join in ch-2 sp.  (36 hdc)

Simple as that. If you are new to rounds and/or patterns this is odd at first, but it starts to make sense really fast.  

Now at this point is where I stop increasing the stitch.  Because this is a newborn hat I want to keep it small and its yarn so it's gunna stretch a bit.  So row 4 is going to be the same number of stitches as row 3, 36.  This is what it would look like in a book.

Also - you can add as many rows are you want.  This doesn't HAVE to be this size just add another hdc before doing the 2hdc increase.  You can go on forever.  :)

Row 4 - 10 - ch2 then hdc in same. hdc in each stitch around and join in ch-2 sp. (36 hdc)

Row 4 will be repeated until you have completed 10 rows.  

Go ahead.  I'll wait.  

(Tick. Tock. Tick.)

This is after 5 rows.  Because you aren't increasing it's starting to bowl.  


Stop at 10 rows.
We are going to do something a little different. You will do the same stitch but in the front loop only. This will cause the hat to be able to flip up easily.  

Row 11 - ch2 then hdc in same. hdc in each FL around and join in ch-2 sp. (36 hdc)

It looks like this. 

The stitch is a "v" shape.  You just want the side closer to you.  Here I pulled them out a bit.  


You will be able to easily fold it on itself.  It's almost a hat!


Continue.

Row 12 and 13 ch2 then hdc in same. hdc in each stitch around and join join in ch-2 sp. (36 hdc) (same as row 4 through 10) Finish off.

After the join pull up to make a big loop.


 Cut it and pull it up.


 Sew it in.


I like to make sure it's secure.  Finishing isn't a science, just weave it in a few times.  Just try not to knot, or you will have a lump.  


Lastly, sew in the tail from the magic circle.


Flip the brim down and wha-la!


Copyright - All photos, pattern, and crochet created and property of Teresa Millies.

10.07.2012

DforV: Puff Stitch. FFFFFUUUUU

This is the hardest stitch I've ever tried to figure out.

One thing I've learned about crochet is that it's not an exact science.  It's not even a science at all.  There are less tutorials online for this than most of the other things I've tried to learn.  I just wanna make this....

This is the best tutorial I've found, but I still just can't get it.

There is also this video.

They seem to be a lot easier not in a flower.

But it just keeps turning into this awkward mess.  I'm going to keep trying.....

So here are three different "interpretations".

left to right.

1. Using an I hook, magic circle, 5 single crochet and one join used as a stitch in the middle,  puff stitch (9 puffs) chain 3 on one side and 2 on the other.

2. Using I hook, magic circle, 11 single crochet and 1 join used as a stitch in the middle, combined puff stitch (5 in the first and 5 in the second)  ***SIDENOTE*** The only reason to split it up like this is to make it easier to get the hook in the single crochet stitch.  It gets to be difficult the more you put in.  Chain 3 on both sides.

3. Using a G hook, magic circle,  5 single crochet and one join used as a stitch in the middle,  puff stitch (9 puffs) chain 3 on one side and 3 on the other.

As you can see, there is only slight variation, but they look a little different.  I wanted a larger one as I will need a TON of these.  But the smallest looks the best.  I prefer the small center.


And away we go.